Converse Dress
Converse-mekko
Dress to wear with Converse
Everyone who knows me, knows also that I am not big on weddings or any sort of big parties, especially not if I have to be the one everyone is watching. So the plan is small civil wedding. I don't care for any fancy dresses either, but the other half wants us to wear something nicer.
I want to wear converse sneakers (got myself a brand new pair in white leather monochrome), so I started looking for dress inspiration using search words "converse" and "dress".
This is the one I liked the most:
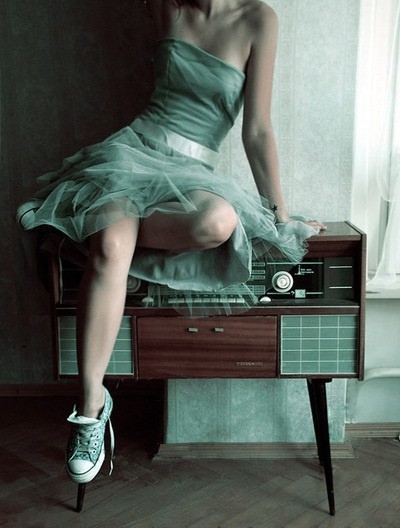
It looks a bit faerie-like, light and simple. It is probably about knee-length, bit difficult to say from this one image. For some reason a lot of my projects start like this, I want to make something that I only have one tiny image of. :)
Materials
I do like the mint green (at least in my head that color is "mintunvihreä"), but I did not find anything like that in Eurokangas. However I did find a nice shiny blue stuff that I liked. I am not very good at color names, in my head all the blue-greens are "turkoosi", turquoise. The one I found is much closer to blue than green and I think a proper English word for the color is aqua.
I also got chiffon in a couple of shades darker blue color that I think will fit, plus some inch wide ribbon to go at the waist. Later, as I changed my plan, I also got some thinner ribbon in the same color.
Design
Originally, I was planning on making the top part strapless with the same sort of cut as in my inspiration image. However my patience was not up to the task, since it turned out not be quite so easy to modify patterns to fit with &%%#"% breasts I got. I seriously do not like the size and "normal" bra makes it worse (my everyday bra is a sports bra that squish them so they look smaller).
I made the blue string dress couple of years ago using the pattern from Joka tyypin kaavakirja. I know for a fact that it works with sports bra, since I've worn one under it both times I've used the dress. I think I did also wear a long-sleeve t-shirt both times, but the arm holes are small enough that I am pretty sure the straps of the bra would not show even without the shirt. So the new plan: make the top using the same pattern. :)
The hem I was always planning to make as a separate piece using (half) bell skirt as the basis. Original plan was to just have a full length zipper, but since I am going to use the pattern from the string dress, I decided to also add strings. They make fitting a lot easier and I think they look very nice. Strings on the bell hem does not sound like a good idea though, so I got a short zipper for the hem. The string is why I got the thinner ribbon. I will make both the string and the hooks for it using the thin ribbon.
Cutting
First thing to cut was the front and back pieces. I made two continuous front pieces (no seam in the middle), one from the shiny blue and one from lining stuff I also got. The lady at the fabric store sold me blue lining that is much paler than the shiny blue, so I hope that it will not show through armholes or anywhere. In hindsight I should have trusted my own instinct and gotten the darker blue, it matched the colour of the chiffon almost perfectly and would look better if it does show. Both materials have absolutely no stretch, so I made the lining with 1mm smaller seam allowances, so hopefully it ends up a tiny bit smaller. I am hoping this will make the lining less likely to show anywhere.
Since I am adding string at the back in a similar way I did with the blue dress, I first cut the back pieces (again both shiny and lining) as one piece each, and then took away 10cm from the middle where the string goes. I am skipping the darts in the back. I did the same in the other dress and it works quite fine, the string does the fitting. I also cut a 20cm wide strip of the shiny blue to go in the middle under the strings.
For the hem pieces, again I cut two. One from the shiny blue, using a half bell skirt, one from the chiffon this time as a full bell. The full bell I also cut so that it is actually a full circle, no seam anywhere. I figure I can cut a hole to fit the short zipper and make it much easier with only the bottom edge to finish and no seams anywhere. Chiffon seems like it will be quite annoying to sew.
The instructions actually say to cut pieces so you get seams in the middle. I am deviating here so that the chiffon does not have any seams, and the shiny blue half bell will only have a single seam in the middle back. Will see how this works, but in my head this is better than three seams, since I am going to put the zipper in the back.


Final piece is a single strip for the waist. Sewing the top and bottom together should be a lot simpler with some sort of waist piece in the hem. I will sew the wider ribbon as a sort of belt on top of this waist strip so it will actually not end up showing if all goes according to plan.
Sewing
First thing here was to sew the folds in both the lining and the shiny. After that was the shoulders, and then it was time to sew together the lining and the shiny top. I did this by sewing the neckline and armhole seams. Then I pulled the back pieces to the front side through the shoulders, so the whole thing was now right side up. Time to iron some seams and see if this thing even works...

Next in line: hooks for the string. Since my fabric is much less rigid than the previous one, and I have thinner string, I think I will put more hooks this time. Initially I did the same thing as in the blue dress: small strips that are folded in two and sewn from one end. This turned out to not work too well with the thin satin ribbon: it gets stuck and is very very difficult to get through the hooks. Also the look is just not quite right. So change of plans: get a wider ribbon for the actual string. It is easier to tie and should look better. Also do the hooks so it is easier to get the ribbon through them, two ends sewn as far apart as the string ribbon is wide.

Second iteration of the hooks and string looks better. After the hooks were fine, I sew the middle part to both halves of the shiny blue. And after that also the linings to the same seem. Now the hooks are actually held by three different seams, I doubt any of them will come loose. :)

Final step of the top part was sewing the side seams, both shiny blue and lining. Some lining instructions I found told me to leave a hole in one of the sides where the dress could be turned around, but since I will not be sewing the hem the way it should normally be sewn with lining, I will skip that. The hem of the top part is not going to be visible anyway, so I will just turn the edge of the lining and sew a seam from the outside to keep it in its place, when I attach the bottom to the top.

Bottom does not have a lot of parts, only the chiffon full bell, shiny blue half bell and waist strip of shiny blue. I sew all of these together with just one seam, shiny blue hem on the bottom right side up, next chiffon and last waist strip right side down. Seam at the top edge of this assembly. In the chiffon I cut a hole going directly down for ~20cm for the zipper. The idea is to sew the zipper to both chiffon and shiny blue at the same time.

Before the zipper I decided to attach the top and hem. This way I can adjust the length of the waist with the zipper a bit if needed. Finding the right height was a trial and error. I just pinned the parts together and tested how it looked in front of a mirror. This is not going to be as cute as the one from the picture. :(
After the parts were together, I cut away the extra left on the bottom of the top part and sew the lining to the waist strip. Then there was the ribbon on top of the waist strip, fairly easy. At the back I stopped the seam at the point where the strings were going, I did not sew the ribbon all the way to the center. Small hand-sewn seam went to the center instead, and I tidied up the ends of the zipper at the same time.
Final thing to do was finishing the hems. The chiffon was very uneven, so first I needed to cut it to even length all the way around. This actually decided the length for me quite nice and easy. I decided to skip any turning and instead just sew a basic zigzag at the hem. Works quite nicely, since the chiffon is very light and airy. The zigzag makes the edge a bit wavy. I was first going to turn the shiny blue hem, but cut it a bit too short. So I decided to just do the same thing as with the chiffon: zigzag the edge. I think it works quite well here too.

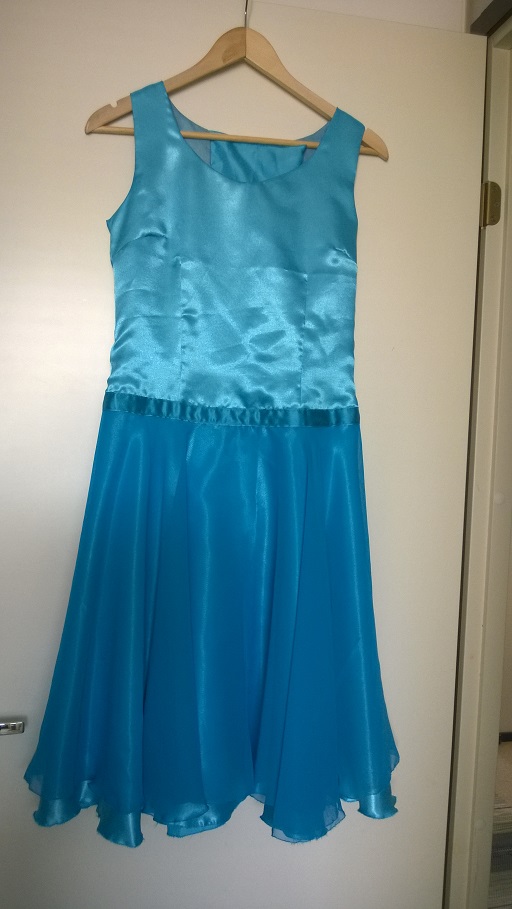
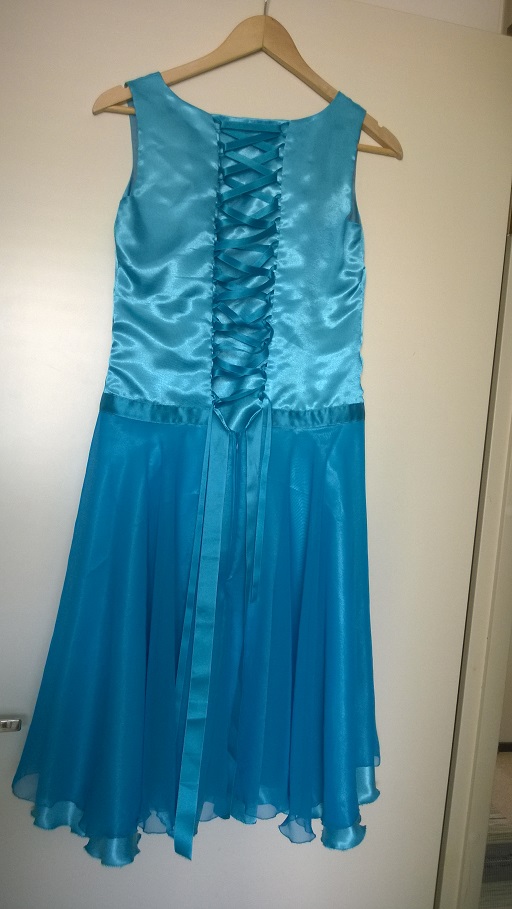
I do not have any pics of me wearing the thing, but here are some hanging pics.


© 2011-2026 Peeta Kiikka | Template design by Andreas Viklund